Welcome to my FlamingFurnace, backyard metal casting blog.

Hi everyone, I mainly focus on metal casting projects using recycled scrap aluminum and other accessories in the pattern creations.
Aluminum is a very versatile material and I would like to promote the awareness of aluminum recycling via different metal casting projects.

Feel free to check my YouTube channel where I provide detailed explanations, tips & tutorials for best backyard aluminum casting methods, homemade foundry equipment & of course the importance of safety when working with molten aluminum.

So remember recycle and Enjoy my blog ;-)

January 24, 2011

Aluminum ingots for the foundry

In this post I will focus on the making of aluminum ingots. The process of making the ingots is very simple all you need is a metal container that will hold the molten metal and will not break under the high temperature. After the aluminum is melted in the crucible and all dross is skimmed off it is ready to be poured into the metal container. I personally don't mix between the aluminum alloys only if they are from the same source of aluminum. I mark every ingot what his origin alloy is from.

As for the ingot container any metal container is good depending how big you want the ingot to be, don't forget it has to be fitted into the crucible.
Big aluminum parts could be broken with a heavy hammer so they will fit into the crucible. Another option is heating the aluminum parts in an open fire until the aluminum is soft enough to be broken easily.

Another very important thing is always work with a dry ingot container and preheat the container before pouring the molten metal to prevent it from "poping" into your face and of course use full body protection gear while handling molten metal. I made a few large ingots using simple tin cans. It is very easy to cut them open in one vertical slice and after just to peal the sides off. Gloves are good to have to prevent cuts from the sharp edges.

Simple example for making a re-usable ingot tray is to weld a few L bars together or just using a tin muffin tray (Not aluminum). It all depends on what size of ingot is desired and how much molten metal is going to be poured into ingots.

Before you know it you will have a pile of aluminum ingots ready for some quality sand casting............ Good luck... and work safe ;-)
First clip pouring round aluminum ingots:

<---Aluminum ingots
Second clip pouring long and slim aluminum ingots:

January 16, 2011

Casting New Aluminum bell cover

This is another quick project I made for my house. After painting the door last year the bell button looked a bit boring so I decided to make it look a bit more "attractive". The design is very basic and the pattern is made from MDF.
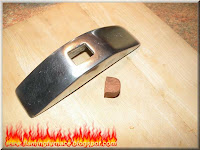
MDF is not great for small patterns but it did the job, the hard part was getting the shape of the bell cover button cavity. So as I did with the aluminum handle pattern (another project) I cut it into 4 parts, that makes it easier to get the mold out without breaking the sand. As for the button I shaped a small part of hard wood. After opening the flask I cut off the sprue and riser, I was lucky there was only a bit of shrinkage on the back of the bell cover because I was a bit short of molten aluminum. Some cleaning a bit of polish and It looks great.

January 12, 2011

Sand casting Aluminum Key Fob

This is a quick project I made casting aluminum Key fob. I made a small flask and a pattern from MDF. After a bit of metal filing and cleaning it looked really cool. The Key Fob could be carried in the pocket and even be used in case of emergency for self defence or for emergency car window exit ;-). I also combined a bit of paracord for this project the Snake stitch guide can be found in my Paracord Projects blog.

Some late addtion threaded adge to give it more interesting look.